How to Improve Audio Quality on Zoom or Podcast Calls
- Dave Hall

- Apr 6, 2025
- 4 min read
Let’s be honest: nobody wants to sound like they’re calling in from the bottom of a bin. Whether you're leading Zoom meetings, hosting a podcast, or just jumping into a group call with decent kit, poor audio is distracting, and makes you come across less professional, no matter how good your content is.
Here’s the truth: upgrading your audio game isn’t just for podcast pros or techies with padded rooms. With a few smart gear choices, some positioning know how, and a touch of software tweaking, you can make your voice sound warm, clear, and broadcast ready. Whether you're at your desk, in your kitchen, or in a cupboard under the stairs.
Let’s break it all down.

Why Audio Quality Matters More Than You Think
We’ve all been on calls where the video’s a bit choppy, but the conversation keeps flowing. Now flip that: pristine video, but the speaker sounds like a toaster in a thunderstorm. Not ideal.
Bad audio:
Distracts listeners
Causes fatigue over long calls
Makes even great content feel amateurish
Good audio, on the other hand:
Builds trust and professionalism
Keeps your audience engaged
Reduces misunderstandings and interruptions
So whether you're pitching clients, recording interviews, or leading a webinar, your voice is your presence. Make it count.
Step 1: Choose the Right Microphone
Built-in Laptop Mics? Avoid.
Unless you’ve got no other option, ditch the inbuilt mic. They're designed for convenience, not quality. More likely to pick up keyboard clicks, fan noise, and general echo than the natural tone of your voice.
USB Mics: The Sweet Spot
USB microphones offer the best plug and play solution for most people. Easy to use, great quality, no separate interface needed.
Top picks (as of 2025):
Audio-Technica AT2020USB-X: brilliant clarity and build
Blue Yeti X: versatile patterns, clean sound, software controlled
Elgato Wave:3: podcast friendly with smart digital mixing
Stick to cardioid mode (front facing pickup) to reduce room noise.
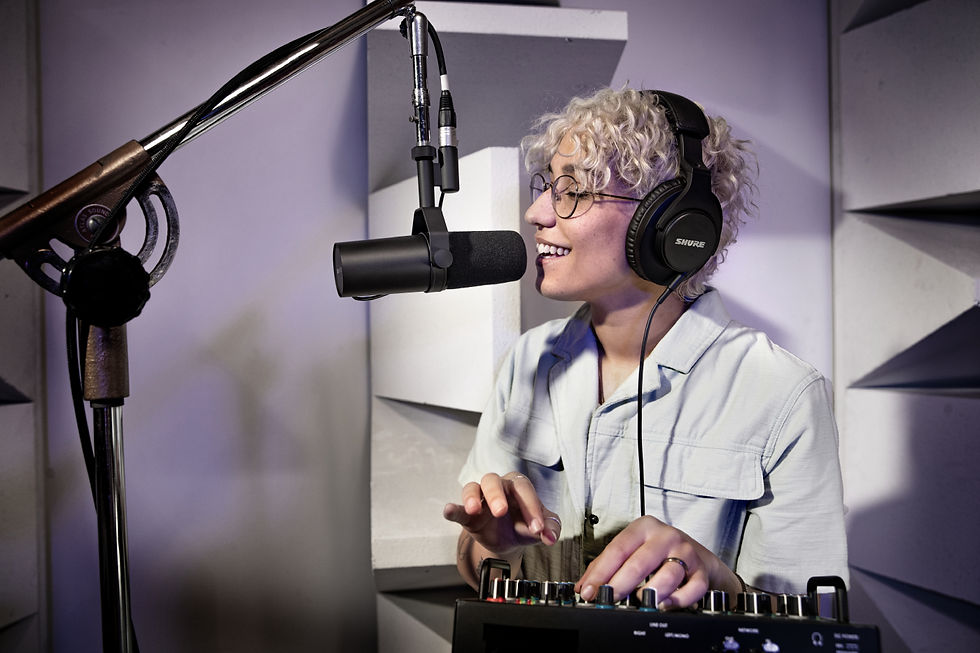
XLR Mics: For the Serious Setup
If you're podcasting regularly or want to go next level, XLR is the way. It requires an audio interface (like a Focusrite Scarlett or Rode AI-1) but gives more control and typically better audio quality.
Recommended XLR mics:
Shure SM7B: studio legend, but needs decent preamp power
Rode PodMic: excellent budget choice with rich tone
Electro-Voice RE20: a classic radio mic with brilliant plosive control
Step 2: Mind Your Environment
Even the best mic sounds rubbish in a bad room. You don’t need a treated studio, but you do need to control your acoustics.
Easy fixes:
Soft furnishings: Rugs, curtains, bookshelves, anything that soaks up sound rather than bouncing it back at the mic
.
Mic placement: Keep it close, 6 to 12 inches away, ideally slightly off centre to avoid breath pops.
Avoid hard surfaces: Don’t record at a bare desk in a tiled room. Add a desk mat or even throw a blanket nearby to reduce reflections.
For Zoom or Teams calls, consider a dynamic mic (like the PodMic), which is less sensitive to background noise than condensers.
Step 3: Use a Decent Pair of Headphones
Using external headphones keeps sound from bleeding back into your mic, which can cause feedback or muddiness. In ear monitors are fine, but over ear and closed back headphones are best for audio monitoring.
Great choices:
Audio-Technica ATH-M50x
Sony MDR-7506
Beyerdynamic DT 770 Pro
Avoid using your laptop or phone speakers during calls, it makes you harder to hear and introduces echo.
Step 4: Control Your Levels and Gain
You want to record or speak loud enough to be clear, but not so hot that you distort. Most software (Zoom, Riverside, Audacity, etc.) lets you tweak input gain or mic level.
General rule:
Aim for voice peaks around -12dB to -6dB (if there’s a visual meter)
Avoid red peaks or sudden spikes
Use a pop filter or foam windscreen to soften plosives (P, B, T sounds)
If you're using an interface, set gain conservatively and do a quick test before going live or hitting record.
Step 5: Use Audio Enhancement Tools (When Needed)
For Zoom Calls:
Zoom has built in audio settings:
Turn on High Fidelity Music Mode (only if you’ve got good bandwidth)
Disable automatic volume adjustment if you’re using an external mic
Turn off echo cancellation and background noise suppression if your mic and headphones are decent
For Podcasts or Pre-recorded Audio:
Use post processing:
Noise reduction (remove background hum or hiss)
EQ (cut mud around 200Hz, boost clarity around 3 to 5kHz)
Compression (balances dynamics so whispers aren’t lost and loud bits aren’t overwhelming)
Limiter (prevents clipping)
Free tools like Audacity, or pro grade ones like Adobe Audition, Reaper, or iZotope RX, can help polish your audio to professional levels.
Step 6: Choose the Right Platform (It Matters!)
Zoom’s fine for meetings, but if you’re doing interviews, podcasts, or high quality remote recordings, look elsewhere.
Best for podcasts:
Riverside.fm: records locally in WAV, even during unstable connections
Zencastr: solid option with separate tracks
SquadCast: pro friendly and intuitive
These services offer uncompressed audio, separate tracks, and often video too, ideal for podcasting or content creation.
Bonus Tips from the Audiophile Cave
Use a mic arm or boom stand. Keeps the mic stable and away from keyboard noise.
Watch your posture. Slouching affects your vocal tone more than you’d think.
Warm up your voice. A few hums, lip trills, or tongue twisters can loosen things up before a big call or recording session.
Mute yourself when you’re not speaking. Sounds basic, but trust me, it’s underrated etiquette.
Final Thoughts: Sound Like You Mean It
You don’t need to drop thousands on studio gear to sound professional online. A solid USB mic, a pair of headphones, and a few tweaks to your setup can make you clearer, more listenable, and far more engaging.
At the end of the day, great audio says: I care about this. And that’s what listeners, clients, or collaborators really pick up on.
So go on ditch the tin can sound and upgrade your virtual voice. You might just surprise yourself with how good you (actually) sound.
— Dave Hall, Audio & Sound Technology | The Tech Advisor


Comments